The Nikon D5200 is a DSLR for hobbyists and aspiring photographers.
Design and controls
The Nikon D5200 is similar to its predecessor, the Nikon D5100, in terms of the shape of the body and the location of the control elements. The device has an average size for SLR cameras. Lightweight and ernogomous, the camera can be carried comfortably with you in any bag or in your hands.

The Nikon D5200 body is made of high quality plastic. The curved rubberized grip allows you to firmly hold the camera without fear of slipping out of your hands.

On the grip of the camera there is a window for receiving infrared remote control. The second window is on the back of the camera, so you can use the remote control from both sides.
The camera is available in three body colors: red, bronze and black.

One of the distinguishing features of the Nikon D5200, like the D5000 and D5100 cameras, is the swivel LCD display. The diagonal of the camera screen is 3 inches, and the resolution is 921 thousand points. The flexible screen provides maximum freedom and convenience for taking photos from any angle and in any position.

There is a white lamp between the viewfinder and the Nikon D5200 grip. It works briefly before the picture is taken and reduces the red-eye phenomenon. In addition, the lamp is used to illuminate the autofocus and serves as a self-timer indicator.
There is no image stabilizer on the DSLR itself. But many lenses, including the complete 18-55 / 3.5-5.6, are equipped with optical stabilizers. On a standard lens, it is turned on / off by pressing the VR on / off slider. In addition, the lens has a switch from manual focusing to automatic focusing and vice versa (A / M).

The camera flash is lowered manually, but a separate button located on the camera body directly above the bayonet mount fixing button brings it into operation. This button can also be used to switch the flash mode by rotating the control dial. In automatic modes, the flash pops up by itself without pressing a button.

Next to the flash control button is a multifunctional "Fn" key, to which the user can program one of the 14 most frequently used functions.

On the top panel of the device there is a separate button with a red dot, designed for video recording. It is located near the shutter button, so it is convenient to press it with your index finger. Nearby are the exposure compensation key (+/–) and the "info" button, which switches the way information is displayed in the Live View mode.

Unlike the D5100, the top panel of the D5200 has a separate button for switching shutter modes. A total of five modes are available to Nikon D5200 users, namely: standard single shot (S), continuous shooting, 10 second delay (with self-timer enabled), remote control shooting (with or without delay), and Quiet shutter mode (makes shooting almost silent).
The "AE-L / AF-L" button is responsible for locking the autofocus and metering, it is conveniently located right under the thumb.
There is a hot shoe mount on the top of the device, designed primarily for flash units.

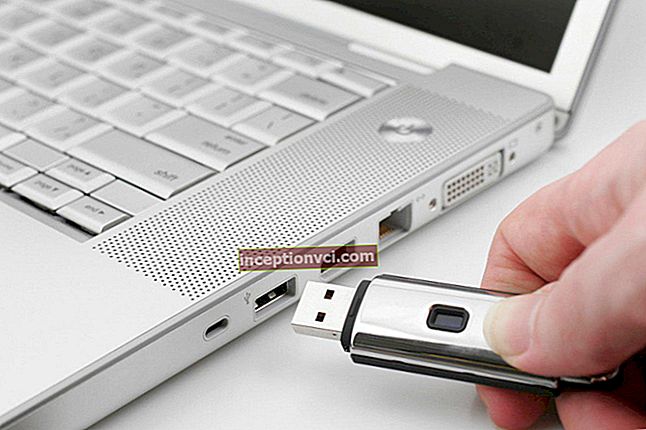
There is a memory card slot on the right side of the device.

On the bottom of the camera there is a battery compartment and a tripod mounting hole.

Internal "filling" and opportunities
The Nikon D5200 is equipped with a 24.1-megapixel CMOS sensor measuring 23.5x15.6mm, with which you can take high-quality and detailed photos.

Due to the EXPEED 3 processor, a high shooting frequency is provided - 5 frames per second. For comparison, the previous version of the device differed by 4 frames per second.
The WU-1a external Wi-Fi adapter allows you to instantly transfer your newly captured photos and videos to your smartphone, tablet or laptop. In addition, if you install a special application on your Android tablet or smartphone, you can configure and control the camera from your mobile device. This feature can come in handy when shooting, for example, wildlife. But, of course, this is only possible with available Wi-Fi.

To control the camera from a mobile device, you first need to install the Wireless Mobile Utility application on your smartphone or tablet. The application interface is minimalist. With it, you can either view the already taken photos on your mobile device, or press the camera control button. A small set of settings is available for remote camera control. You can turn Live View on / off, activate the timer, and tap to select the focus point. The captured image can be saved on the camera or transferred to a smartphone (tablet).

The Nikon D5200 can shoot high-frequency Full HD video at up to 50 frames per second, and the built-in stereo microphone provides high quality soundtrack.
Interface
Shooting information can be displayed on the Nikon D5200 in a conventional or graphic design. The common variant resembles the design used in the Nikon D7000, and is numeric. In the graphic design, three animated discs are displayed on the screen showing the current ISO, shutter speed and aperture settings. Disks track changes in current parameters.
Information on the device screen can be displayed in one of three color schemes: blue, beige or gray.

In both designs, there is a control panel at the bottom of the Nikon D5200 screen. It is represented by 14 parameters located in two horizontal rows (7 parameters in each row). The panel is passive; to activate it, press the "i" button on the camera body. After pressing it, it becomes possible to configure the values of the control panel parameters. The selected parameter is highlighted in yellow. Moving through the list of settings is done with the navigation buttons, and the selection of the desired parameter by pressing the "OK" button.

The control wheel located on the camera body is not used when selecting settings and options in the menu. It can be used only when configured for those parameters for which there are physical buttons.
The camera navigation buttons are used not only to navigate the menus, but also, for example, to select an AF point.
Under the navipad on the rear panel of Nikon D5200 there are "+" and "-" buttons, with which you can scale the image in the viewing mode or in real time. In addition, the "-" button is used to open short tips that appear. For example, when shooting in poor lighting conditions, an icon with a question mark may appear in the lower left corner of the screen, pressing the “-” button displays a recommendation to turn on the flash with a list of its features.

Sufficiently informative tips make the process of photography easier and easier. Unfortunately, the Nikon D5200 does not provide GUIDE mode, and therefore a beginner photographer will have to deal with the assignments of each parameter of this camera on their own.
When you rotate the camera display vertically, the image on it does not unfold.

The Nikon D5200 main menu is divided into 6 items: playback menu, shooting menu, custom settings menu, setup menu and retouch menu, and “Recent settings”.

Functions and modes
You can select the shooting mode using the turntable located at the top of the device.

When programmed auto (P) is selected, aperture and shutter speed will be automatically adjusted by the camera for the most optimal exposure. In aperture priority mode (A), the user sets the aperture, and the camera automatically determines the shutter speed. Accordingly, in shutter priority mode (S), the user sets the shutter speed, and the aperture is automatically selected. Manual mode (M) assumes that the user can independently select the value of both shutter speed and aperture.
Selecting the "AUTO" mode with a green camera icon assumes fully automatic selection of shooting parameters. The flash in this mode pops up itself in case there is not enough natural light.
Novice photographers will find it convenient to work with scene modes, the main of which are - "Sports", "Landscape", "Child", "Macro", "Portrait". These modes on the swivel wheel are rendered separately. In addition, there are 11 more scene modes - "Food", "Sunset", "Night landscape", "Blossom", "Pet portrait", "Party / Indoor", "Colors of Autumn", "Beach / Snow", "Twilight" / Dawn "," Night portrait "and" Candlelight ". They are accessed through the position on the "SCENE" wheel. The “Shooting without flash” mode is highlighted separately.

On the mode dial, you will also find the inscription “EFFECTS”. If you set the dial to this label, a menu of effects that can be applied to the captured image will open. There are seven such effects in total:
1. "Color Sketch" - an effect that softens the tones, emphasizes the contours and ultimately turns the photo into a kind of pastel drawing.
2. "Miniature effect". This effect simulates macro photography by blurring the background and foreground.

3. "Night vision" - an effect that allows you to take a picture in low light conditions and the absence of a tripod by creating a monochrome image with a high ISO value.
4. "High Key" - an effect that creates an airy, light atmosphere in the pictures.
5. "Low Key" - an effect that makes the photo dark and gloomy.
6. "Silhouette". This effect increases the contrast of the image so that only silhouettes can be left in photographs.
7. “Selective color” is an effect that can be used to leave only one selected color in a photo and make the rest of the photo in black and white.

The OSD menu allows you to select the desired size and quality of still images. When choosing the quality, you need to specify the format in which the image will be saved - JPEG, RAW or RAW + JPEG. The JPEG format is available in three compression levels - Basic, Normal and Fine.
You can choose from three image sizes: small (4.7 megabytes), medium (9.2 megabytes), and large (15 megabytes). The file sizes are indicative only.
Focusing can be done either manually (MF) or automatically. AF-S is selected for focusing on inanimate subjects. Continuous AF-C is applied to focus on a subject that is moving. Focusing is performed while the shutter button is half pressed. In AF-A mode, the focus type is automatically selected depending on whether the subject is moving or not.

The focus area can be set as single point or dynamic. Dynamic AF is selected when a large number of subjects move in automatic order. Focus can be selected using 9, 21, or 39 points. In addition, you can apply the 3D tracking mode or set the auto zone selection. In 3D, single point and dynamic modes, the AF point can be manually set using the navipad and the OK button to select the center focus point.

An arrangement of 39 focus points is displayed on the left side of the screen below the shutter speed dial.

The intensity of noise reduction in Nikon D5200 can be adjusted. To do this, you need to select one of four options: Off (off), Low (moderate), Normal (normal), High (enhanced).

Nikon D5200 users can combine 2-3 shots in one frame, that is, perform multi-shooting, time-lapse shooting, or delay the recording time up to 1 day.
When shooting in high-contrast lighting conditions, the Active D-Lighting function will be useful, its use will help to lighten overly dark areas of the frame and prevent overexposure, that is, all the details of darkened or blown objects will be preserved in the photo. The user can select the intensity of this function (moderate, normal, boosted and super boosted).

In difficult lighting conditions, a useful function of the Nikon D5200 camera will be exposure bracketing - the ability to take three consecutive photos with different exposures. First, a photo is taken with a pre-set exposure, then a plus shot and a minus shot from the set value.
In HDR mode, the camera takes a series of quick frames at different exposures, all frames are then combined into one shot. The result is a high-quality photograph with improved shadow rendering and increased dynamic range. The HDR intensity level can be selected from 4 options, or set to automatic.

It is worth noting that exposure bracketing and the HDR function are the distinguishing features of the Nikon D5200 camera from the lower models.
An already finished photo can be cropped using the crop function. Also, you can apply various effects to the pictures (sepia, for example), adjust the color balance. A clipped horizon in a photo can be corrected using the Equalize function, and RAW processing will correct an image with an incorrect exposure or white balance.

Filming
To start shooting Nikon D5200 movies, you must first enter live view by pressing the lever under the mode dial on the top of the camera. And only after that it is possible to carry out video recording by pressing the button with a red dot.
In live view mode, a black bar with the values of the main parameters is located at the bottom of the screen. You can switch the amount of information displayed on the screen (for example, turn on the framing grid) using the "info" button.
For video shooting, you can select one of 4 autofocus modes: normal area, wide area, face priority (a yellow frame appears on the face) and subject tracking (a green frame appears on the subject image on the screen, which turns red as soon as the subject disappears from the shooting area) ...

The user can choose the video quality, frame rate, microphone sensitivity.

During video recording, you can take a photo, but the video recording will stop.
After filming the video, the user can view the footage on the Nikon D5200 display. The "OK" button starts video playback. The current and total time of the video is displayed at the top of the screen. The sound volume is adjusted with the "-" and "+" keys. Using the navipad buttons, you can rewind the video forward or backward, as well as pause playback.
The built-in video editor in Nikon D5200 can save a single frame or crop an excess part of the video.
Output
Nikon D5200 is a compact SLR camera with easy-to-understand menus and many settings, which will be a great option for the aspiring photographer. The rotary display will make shooting comfortable in any conditions and in any place, and well-chosen optics will provide high-quality images with high detail.