If in childhood models of airplanes were glued together, then making a long-distance casting rod is easy. Under your hands. And under your own idea of fishing. Because NOBODY can make the perfect rod better than himself.
Go to a store that sells the items you want, or order online.
- Buy a false ceiling mounting stud
It is in the form of a rod with a cut thread. Take two with a diameter of ~ 6 mm, or better - 4. Do not buy expensive (steel), simple ones will do.
- Select washers of different diameters for the studs
Smaller ~ 20 mm and large ~ 30 mm. This is how it should be. When you glue the cork, the pressure will be more or less evenly distributed on the end face of the future handle. Since the standard plug diameter is 32mm, a 30mm washer will do just fine. Accordingly, you will have to buy threaded lambs that will compress the cork (see photo below).
- Don't forget waterproof PVA
Marked D-3. Imported is better. It is universal, which means it will come in handy on the farm.


- Take sandpaper of different grades
From coarse-grained to zero. I chose a fabric backing, but paper is also used. It's up to you to decide.
- Need two brackets to turn a drill into a lathe
If you don't have a drill, you'll have to buy one. I took German brackets (look at the photo) made of the strongest plastic.
- At least one bearing is required
Better yet, two or three. With a diameter of just over 6 mm and an outer diameter of 15 mm. Measure the caliber on the spot. It is important.
- Buy cutters
The kind that furniture makers use to cut holes in tables for routing computer cables. A milling cutter is needed to cut a circle in a wooden board, then make a sample of a tree and put a bearing there on epoxy glue. By the way, take it too, it's not expensive.
How to make a rod: choosing plugs
With a quality cork - strained. Interestingly, there is no quality classification standard.
I ordered the first plug in the USA. I took 3 types at a price of $ 1 to $ 3.5, since I did not orientate myself at all in quality. In principle, I was satisfied. Bribed names like "Extra Select", "Super Fine". But over time, I realized, you need to focus on Grade FLOR. It is not a shame to assemble a handle from this cork in order to make a fishing rod correctly.

I also recommend Grade 5Star. Although this cork comes with a smaller width than the standard 12 mm, it is the best option in terms of price and quality. I do not know of a single brand of Japanese spinning rods on which there would be a cork of this quality.
Summing up, the following picture appears in the table.
| Bung | Quality | Features of the |
| Grade 5Star | Very good | Not porous, so it looks like natural |
| Grade FLOR | Good. Stands on the finest Japanese-made fishing rods | High price |
| Grade EXTRA | Bad | Putty, stands on simple American spinning rods |
| Grade A + | Very bad | Take such a cork only to blow off the dust, only then do the putty |
Here it is - Grade A +. You can choose with or without a hole. With the one without holes, more fuss. But sometimes it is better to get confused with drilling holes for UL blanks, in which there is a thin butt, so as not to pile up a lot of resin.


Choose a cork of the same color and structure, and only then decide which handle is more convenient. It is better to focus on the length of the future spinning rod. Choose 2 cork rings, which will be at the ends of the handle, even. Ideally, finish by hand on a sheet of sandpaper. It is useful to fine-tune all the rings that will be in the handle. This will ensure a snug fit of the plug without over-squeezing with the clamping wings. Accordingly, it will deform less.
Rubberized cork is a mixture of chemicals and crumbs. I like this:

When you have decided and figured out in what order the rings will go, make a set on a hairpin and clamp it with lambs.This is done to draw a straight line and number. You should get the following result.

And then this:

I advise you to look at the cut of the cork. Combine the handle so that the cavities that "come out" when turning are on one side.
How to make a fishing rod at home: the final touch
Consider the handle glued together. We are waiting for a day to dry out. Then, after removing from the pin, wait a couple more hours to dry in the middle.
- Cut the pins into pieces 5-8 cm longer than the handle. The shorter, the less bumping will be felt when sharpening the pen. For this I use a rod that I pulled from a dot matrix printer. There are guides along which the carriage moves.
- Take a pin along the length of the handle and wind up the masking tape. Its width should be 19 mm.
- Make rollers on the hairpin every 2 cm. And of such a diameter that the handle fits tightly.
- Roll the rollers to one side, as the handle will have to be wrapped around the pins. You will shoot in the same way later.
Now we sharpen:


- I have sandpaper glued to wooden rulers, so it is more convenient to sharpen. But you can also use your hands - with strips of sandpaper. Wooden rulers are not easy to find. It is important that the "correct" rulers come across - with a radius division. This helps to create smooth transition lines.
- I start turning when I clearly formulate the handle in my presentation. I don't make any drawings. Easily screw up the handle and remove more plugs than intended. Therefore, measure more often, the saying “measure seven times, cut once” is very relevant in this case.
- Measure and sharpen.
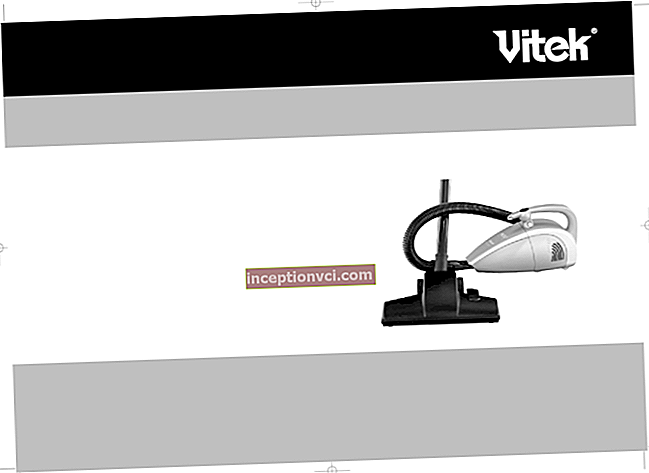
If you will be sharpening plugs in an apartment, use a vacuum cleaner. Then you don't have to generalize the room. Buy a spare bag because the dust from the cork can be used as a putty. If you use a Grade FLOR plug, no putty is needed.
Read: "How to Catch Crucian Carp"
Watch the video on how to make a fishing rod from a stick