Checking the motherboard
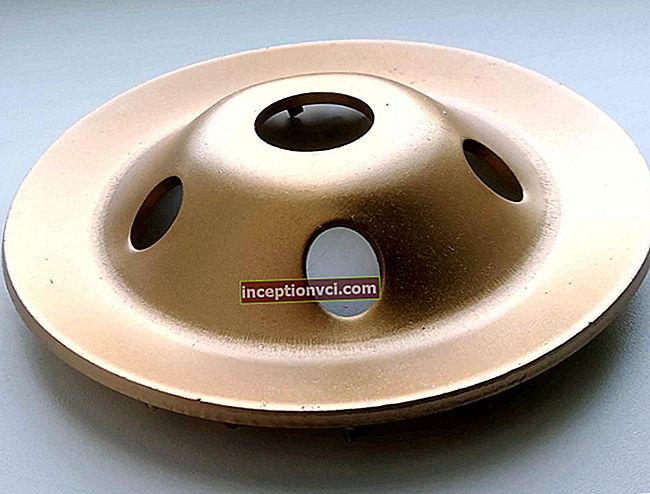
First, turn off the computer, remove the panel from the case and examine the motherboard. Sometimes, when examining the insides of a computer, such a situation is found - the cable was simply not connected. Usually, the audio connector is marked with the AAFP abbreviation, and, regardless of color, has nine pins (two rows of five pins, while the second from the right in the top row is missing). The cable and connector might look like this:

Or like this:

Having found the connector, we connect the cable, close the case and turn on the computer. When connecting a microphone and headphones, the system usually asks for confirmation. But if it still doesn't work, read on.
BIOS settings
By default, the sound in the BIOS settings should be enabled, but it doesn't hurt to check it again. BIOS interface may differ for different motherboard models. Below are examples of where to look for sound settings in the BIOS. Do not be alarmed if your interface looks different, try to do it by analogy.


Or like this. Instead of “Integrated Peripherals”, it could be “Onboard Device Configuration”.

First, we check the state of the "HD Audio Controller": if it is off ("Disabled"), then turn it on ("Enabled").

The next step is to check the front panel audio connection (“Front Panel Type”). In our case, there are two HD Audio / AC97 options, and we check which one works.

If this does not help, then go ahead.
Installing the Sound Driver
Perhaps the problem is in the driver and needs to be updated. For Windows 7 it looks like this (to tell the truth, for Windows XP, for Windows 8, the sequence will be about the same). Find the "Control Panel" tab and select the "Hardware and Sound" section. In this section, select "Manage audio devices"

In our case, this is a Realtek Digital Output device, so select it and go to Properties.

In the next window, also select "Properties"

And here, finally, we find the button we need in the "Driver" - "Update" tab.

The best way is to download the latest driver from the net and place it where you can easily find it. Another option is to use the distribution kit, which should be on the disks that come with the computer.
If this did not help, then proceed to the next step - setting up the sound through the audio manager.
Setting up sound in Windows XP, 7, or 8
Everything is quite simple, further configuration is carried out through the audio manager. In our case, you need to go to the "Realtek HD Manager".

In our case, we click on the button in the form of a daddy, as shown in the picture below. In your case, everything may look different: the icon may look different or be in a different place; it may not exist at all, in which case we are looking for an audio jack setting.

Now you need to switch the connector setting from “Front Panel High Definition Audio” to “Front Panel AC97”. Picture below:

After that, the problem should be resolved.
For Windows XP and Windows 8, this procedure is basically the same. Below are screenshots of the Windows 8 interface - the Realtek HD icon and a dialog box that pops up when you click on the icon.


Read: “How to clean your computer from dust. He can work faster. "
Watch the video review of the Be Quiet case! This is agony !!!