Dust slows down the computer because it impairs heat transfer from the CPU and video card. They overheat to a critical level when throttling is triggered. This is a mechanism built into the processors that reduces their performance, thereby lowering the temperature.
You need to clean your computer from dust not when there is a need to speed up the computer, but at least once a year. The lower the system unit is, the more it collects dust. The specimen that we cleaned did not know cleaning for six months, and the photographs show that it is thoroughly dusty. Although this is not the most neglected option yet.
Two options to clean your computer: express and deep
To quickly remove dust from the system unit, remove the cover from it and vacuum it. Try not to damage anything. It will take 3 minutes, but it will get rid of only part of the dust. Therefore, we will talk about method # 2.
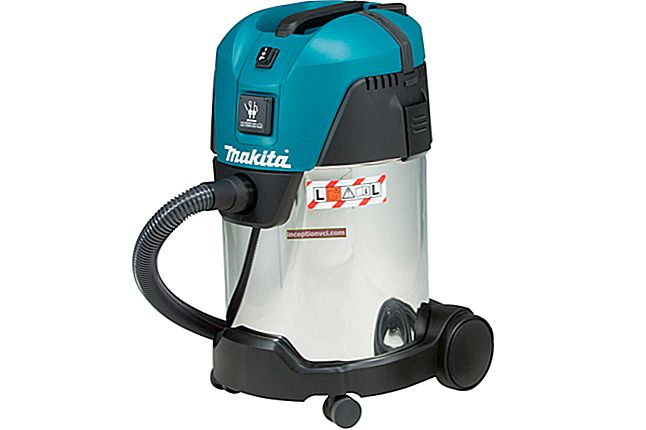
Thorough cleaning involves dismantling and cleaning the cooler, processor and video card, as well as putting things in order in the case. You will need a flat head screwdriver, a Phillips screwdriver, ethyl alcohol, paper towels, thermal grease, a cleaning brush, and a vacuum cleaner (which doesn't fit in the photo).

How to disassemble the system unit
Turn off the computer and disconnect all cords from the system unit. We take it out of the place where you have it, into free space.
When disassembling any part of the computer, use the golden rule: before you spin something, turn it off, take it out, take a photo or write down how it was. Then it will be easier to collect.
We put the system unit on its side. To open it, unscrew the screws securing the cover on the back panel. Most often, after that it needs to be moved towards the rear panel.
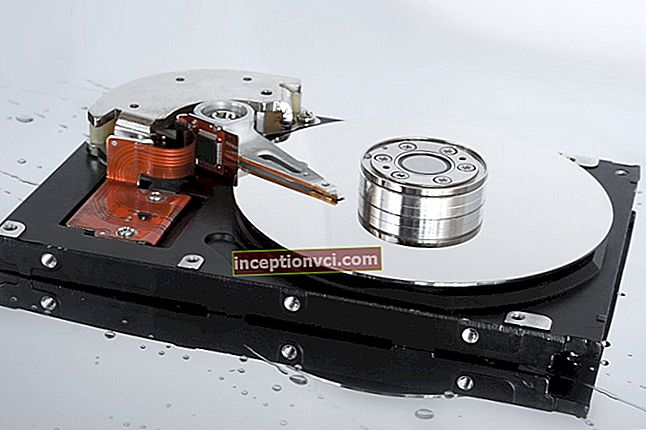
 This is the picture that opens up. Our main goal is a cooler or CPU cooling system consisting of a fan and a heatsink. In the photo it is in the center, boxed version. The second target is the video card, which is visible to the right of the cooler.

How to remove a cooler from a processor
First, remove the fan. Using a flat screwdriver, slightly bend its side latches one by one and pull the fan up. There are options when it is fastened with screws or not removed from the radiator at all. In the latter case, it can only be cleaned superficially.
 After removing the fan, disconnect it from the motherboard.
Useful article "How to disassemble a cooler»

How to remove a heatsink from a processor
The radiator can be attached directly to the motherboard with screws, then you just need to unscrew them. Or a plastic slot-frame is attached to the motherboard, and the radiator is snapped into it. In this case, to remove the radiator, lift the latch holding the bracket. We disengage the grooves of the staple on both sides and gently pull up.
If the thermal grease between the processor and the heatsink is dry, the heatsink may come off with the processor. In this case, gently pry the processor with a wooden or plastic tool and disconnect. It is better to do this with gloves.

How to remove the processor
We release the processor latch on the socket. Now you can disconnect the processor itself by pulling it up. Please note: there are metal feet on the back of the processor. Be careful not to bend them.

How to clean the system unit
After removing the cooler and processor, we clean the system unit from the inside, i.e. trying to remove dust from all other elements. To do this, we use a regular vacuum cleaner and a clean, dry small brush. When connecting the vacuum cleaner hose to the accumulation of dust on the motherboard or in the case, use a brush to scrape it out of the corners.
 You need to be careful with all protruding elements on the board so as not to break them. We clean everything that we see and what we can carefully approach.
 An alternative cleaning option is to use compressed air cylinders, which can be used to blow through contaminated areas. But the dust will still settle somewhere, and it is harmful to breathe it.
Do not wipe the inner surface of the processor with a damp cloth! After that, computers don't survive!
How to clean the processor
As a rule, there is no dust on it, but there are residues of thermal paste, usually dried out. The easiest way to remove them is to use a paper towel moistened with alcohol. It happens that the paste has already turned to stone and alcohol does not take it - then try more aggressive substances such as solvent or acetone. Do not use wet wipes or rags!

How to clean a cooler
We clean the radiator separately, and the fan separately. First, with the same napkin with alcohol, we clean the lower side of the contact plate of the radiator from the rest of the thermal paste. Then, with a brush and a vacuum cleaner, we clean the ribs from dust. Alternatively, flushing the radiator with water is allowed, but followed by thorough drying. There should be no moisture left in it by the time of installation.
 The fan is cleaned with a brush, blown with air, and wiped with a napkin dipped in alcohol. Be careful with the fan blades, they are easy to break.
 When you are finished cleaning, try turning the fan manually. Rotation should be easy, without unnecessary noise and strong axial play. Allowed movement along the axis up and down a couple of millimeters. But if there is noise, strong backlash, or generally the fan does not spin well by hand, it is better to replace it.
Thermal paste replacement and assembly
When all parts are cleaned, you can start reassembling. Re-coat the processor with thermal paste.
You need to change the thermal paste every six months, but if you are going to clean your computer more often, change it every time you clean it.
How to apply thermal paste? - Very sparingly, literally at the tip of the nail. It's not about greed, it's just that the layer of thermal paste should be as thin as possible for effective thermal conductivity. So don't overdo it.
 Smear the paste with a clean finger or a "spatula" from a plastic card. It is necessary to cover the entire surface of the processor, while distributing the paste evenly, without gaps, but without crawling over the edges. We collect the excess from the edges with a napkin or cotton wool.
 We put the processor in place so that the corner marked with a golden triangle on it coincides with a similar corner in the socket. This is the only position in which the processor will sit properly. It just "falls" into the slot by itself, no need to press. Then we fix it with a clamp.
 Reinstall the radiator. To do this, you need to bring the grooves of the bracket under the hooks, hook them, and press the radiator with the handle. It should fit snugly and not wobble on the processor.

 If your heatsink is pressed against the motherboard with screws, tighten them with even force crosswise. Then it remains to put the fan in place and connect it.
How to remove a video card and clean it
If you have an external video card with active cooling, that is, with a fan, it should also be cleaned.
 We remove the video card. To do this, we tighten the screws on the case that hold the board.
 Then, depending on the design of the slot, you need to squeeze or move the clamp to the side and gently pull the board up.
 We make sure that there is also enough dust here.
 Therefore, armed with a brush and a vacuum cleaner, we carry out cleaning. Everything is the same as with the processor cooler: we clean the dust from the cracks with a brush and lift it into the air, remove it with a vacuum cleaner. We clean carefully so as not to damage the blades. We remove especially stubborn dirt with alcohol.
 Then we install and assemble everything in reverse order.
When you are finished cleaning, make sure that the cables you disconnected inside are back in place and firmly seated in their sockets. You can make a test start of the computer without replacing the cover.After making sure that everything is spinning, working and making less noise, close the system unit and get down to more pleasant things.